[latexpage]
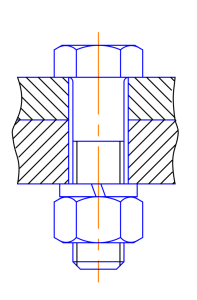
You can see them just about everywhere you look. From massive structural steel joints that make up the Golden Gate Bridge to the intricate inner workings of an antique swiss watch, bolted connections dominate our world.
Let’s assume that a 1/4-20 bolt will yield at a tensile load of 2.85 kips. If a 1/2” long ¼-20 bolt is torqued to a pre-load of 2.4 kips holding two 1/4” steel plates together, how much more tensile force can you put on the joint?
0.45 kips? – No, it’s more complicated than that. The real answer is 2.66 kips!
But how is that possible? The answer lies in the physics of a bolted connection.
Basic Principle of Bolted Connections
First we need to look at what a bolt actually does.
Ok, I know, a bolt holds two or more things together, but how?
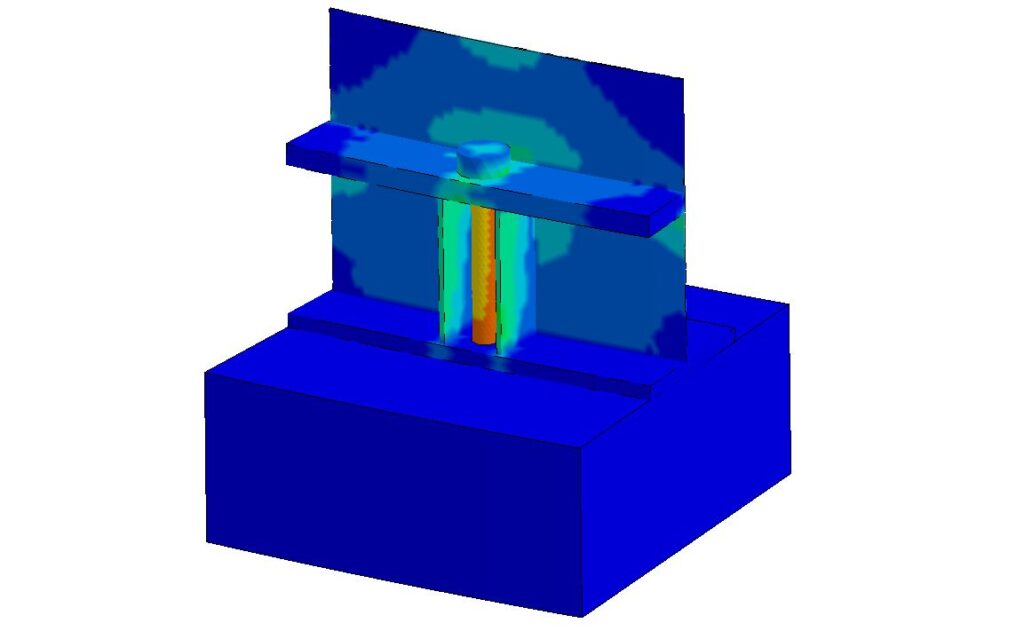
When you tighten a bolt, you are actually stretching it. Remember, a screw is a simple machine, and applying a torque to the bolt causes the bolt to tighten. As it tightens, 3 key things are happening.
- The bolt is being stretched
- The items being bolted are being compressed
- The load on the threads at the nut is increasing (both on the bolt and nut), increasing the normal force on the threads, and increasing the frictional resistance
These are some of the key factors when designing bolted connections.
Bolt Pre-Load: Calculating 75% to 90% of Proof LoadBolt Load

So if the bolt is being stretched, there’s obviously a load on the bolt. How much pre-load the bolt should have varies depending on what exactly is being bolted together, and the intended use. As a rule of thumb, you can use the following
$F_i$=75% of proof load for non-permanent connections, reusable fasteners
$F_i$=90% of proof load for permanent connections
And of course, proof load is merely the tensile area of the bolt multiplied by the proof strength.
$F_p=A_t*S_p$
Where
$F_p$ = Proof Load
$A_t$ = Tensile Area
$S_p$ = Proof Strength
WARNING: This is probably one of the most variable conditions when designing a bolted connection. Some connections should be tightened to the bolt yield strength. Please use a book like Mechanical Engineering Design by Shigley, or the Machinery handbook to make sure you’re using the right value.
WARNING: For flanged connections, don’t use this! You don’t really know the member stiffness $k_m$ because the join isn’t in bearing at the bolt. Tables are available for bolting flanged connections.
Bolt Stiffness
The reason that a bolted connection can take so much load is because of the relative stiffness of the bolt and the things being bolted. Let’s look at the stiffness for a bolt first, then we’ll look at the member stiffness.
The stiffness of the bolt is a function of a number of factors, namely:
- Bolt Threaded Diameter
- Bolt Un-Threaded Diameter
- Length of Threaded portion
- Length of Un-Threaded portion
- Bolt Material
The bolt itself can be thought of as its own spring system. There’s a spring for the un-threaded portion, and a spring for the threaded portion. To find the bolt stiffness, we need to evaluate the bolt in terms of the spring constant (how much force it takes to stretch or shrink by a certain distance) for those imaginary springs in series.
First, the spring constant needs to be determined for the threaded portion.
$K_t=\frac{A_t*E}{l_t}$
Where
$A_t$=Tensile Area
E=Modulus of Elasticity (basically a spring rate)
$L_t$=length of threaded portion.
The spring constant for the un-threaded portion is calculated the same way.
$K_d=\frac{A_d*E}{l_d}$
Where
$A_d$=Un-threaded Bolt Area
E=Modulus of Elasticity (basically a spring rate)
$L_d$=length of un-threaded portion.
Now we need to combine these spring constants.
Remember, springs in series add like the inverse of the sum of the inverses. The equation looks like this.
$\frac{1}{k_m}=\frac{1}{k_1}+\frac{1}{k_2}+\frac{1}{k_3}…$
$k_m=\frac{1}{k_1+k_2+k_3…}$
So the bolt spring constant is
$K_b=\frac{A_d*A_t*E}{A_D*l_t+A_t*l_d}$
So now that we know how stiff the bolt is, we need to look at the members being bolted.
Member Stiffness
Joint stiffness is as simple as it sounds. Basically, how squishy is the joint? Are you bolting two steel plates together? Is there a gasket? Are you bolting wood to steel?
The formula for member stiffness is below. It’s easy to derive, but we’ll just give you the formula. This would be applied for each frustum.
$k=\frac{0.5774\piEd}{ln\frac{(1.155*t+D-d)(D+d)}{(1.155*t+D+d)(D-d}}$
Where
$d$ = nominal diameter
$D$ = Diameter of Washer Face
$E$ = Elastic Modulus of the Material
And we have two members being bolted. So again, think of the materials being bolted as springs in series. When you tighten a bolt, you’re basically squeezing both springs at the same time. Each spring has a different resistance to being squeezed, called the spring constant (k).
When springs are in series, we can replace that with a single spring with a single spring constant. To do this, we invert the sum of the inverses like we did for the bolt.
$\frac{1}{k_m}=\frac{1}{k_1}+\frac{1}{k_2}+\frac{1}{k_3}…$
$k_m=\frac{1}{k_1+k_2+k_3…}$
Now we have the member stiffness telling us how squishy the members are ($k_m$).
Joint Stiffness: Combining Bolt and Member Stiffness
The bolt and members are in parallel, so those spring constants just add together. The overall stiffness of the joint is $k_b+k_m$.
This is a powerful thing to know about bolted connections, because it tells the engineer exactly how much of the load is taken by the bolt, and how much is taken by the members.
Now we can look at how much load the bolt takes after it’s been pre-loaded, and after an external load is applied.
Why Can The External Load Be So Big?
For a given joint in tension, the amount of load that the bolt takes is only a portion of the load for the joint. This makes sense because we just figured out that the load is shared with the members and the bolt itself. The amount of load that the bolt takes is simple to calculate.
$F_b=\frac{k_b}{k_b+k_m}*P+F_i$
Where
$F_b$ = Bolt Load
$k_b$ = Bolt Stiffness
$k_m$ = Member Stiffness
$P$ = External Load
$F_i$ = Bolt Pre-Load
In words, the bolt load is equal to the amount of the external load shared by the bolt plus the bolt pre-load. Simple. Powerful.
It’s powerful when you look at the $\frac{k_b}{k_b+k_m}$. This parameter is sometimes simplified at “C”. It’s the percent of the load that will be carried by the bolt.
So if the parameter is only say 0.10, then only 10% of the external tensile load is carried by the bolt! The rest is carried by the members!
Remember to Look at Physics
It’s easy to get lost in the math and forget about the real world. If the bolt only takes 10% of the load for a particular joint, then I could put an incredible load on the joint without failing the bolt, right?
Wrong!
Remember, if you load a joint strong enough in tension, the joint will separate. When the joint separates, all of the load is then going into the bolt, which will cause it to fail very quickly.
We calculated the load on the bolt above. The load on the member is
$F_m=\frac{k_m}{k_b+k_m}*P-F_i$
Where
$F_m$ = Member Load
$k_b$ = Bolt Stiffness
$k_m$ = Member Stiffness
$P$ = External Load
$F_i$ = Bolt Pre-Load
When the joint separates, $F_m$ will go to zero, so solving for P, the resulting allowable load would be
$P=\frac{F_i}{\frac{k_m}{k_b+k_m}}$
A look into the details
Don’t believe it? Let’s look at the details of the analysis.
Let’s say you have a ¼-20 SAE grade 5 bolt. This is what you’ll typically find in the hardware isle at Home Depot. The specs for this bolt are below
- Proof Strength=85ksi
- Yield Strength=92ksi
- Modulus=30e6 psi
- Ultimate Strength=120ksi
- Tensile area=0.031 $in^2$
- Grip Length=1/2 in
- Un-threaded Length=0 in
If this is a permanent connection, the bolt pre-load needs to be 90% of the proof load.
The proof load is the Proof Strength times the Tensile Area, which is 2.6 kips.
If the bolt is tightened to 90% of the proof load, then the bolt pre-load is 2.4 kips.
The bolt stiffness (spring constant) is found to be 1860 kip/in
Let’s say the members are two plates of 1/4 inch thick steel. Doing the math gets a member stiffness of about30,770 kips/in.
The overall joint stiffness is 15,390 kips/in.
Now with this connection, how much tensile load can it take until the bolt yields?
At yield, the bolt load would be loaded with 2.85 kips of force.
Doing the calculation, I can load that joint up to 4.5 kips before it even yields, and that’s in addition to pre-load. But we do need to remember that the joint could separate. The point at which the joint will separate is at 2.66 kips, so the external load is capped at this point.
So here we have it. If the bolt will yield at 2.85 kips, and pre-load is 2.4 kips, then it would seem that I could only load the joint an additional .45 kips before failure. In actuality, I can load the joint an additional 2.66 kips!


